PSXHAX.COM website and domain for sale. Contact Us with your offer!

You are using an out of date browser. It may not display this or other websites correctly.
You should upgrade or use an alternative browser.
You should upgrade or use an alternative browser.
Changing PS4 Pro Hard Drive & PS4 Pro HDD Removal Tutorial Videos
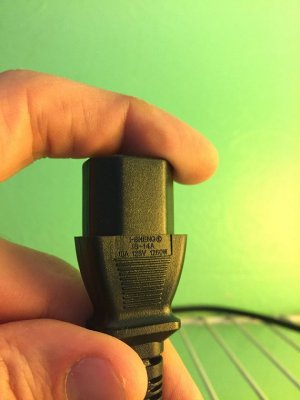
Earlier today we saw the PS4 Pro LED light strip powering up, gameplay & loading time videos, and now we have a few more video demos from Juniper Roth of Maxwell Inc. Studios featuring the changing a PS4 Pro hard drive, a power supply plug piccy and a PS4 Pro HDD removal tutorial below! 
For those not keeping track, some PS4 Pro Unboxing videos are now live and Sony recently updated their PlayStation 4 Professional FAQ... so we've followed suit on the PS4 Pro Ultimate FAQ here with the latest additions near the bottom.
PS4 Pro: How To Change the Hard Drive
PS4 Pro Hard Drive Removal (High Quality)
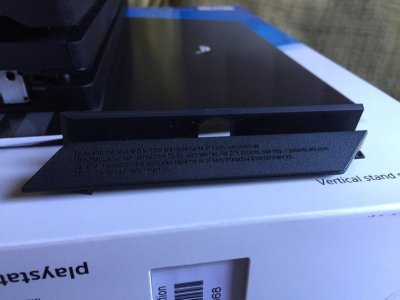
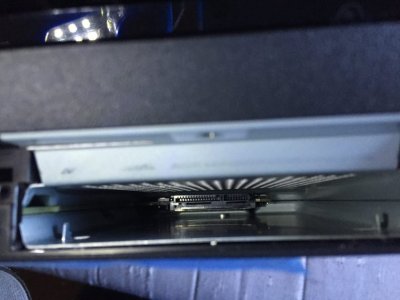
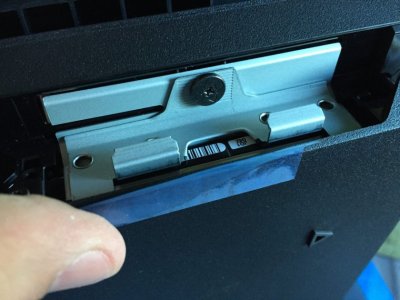
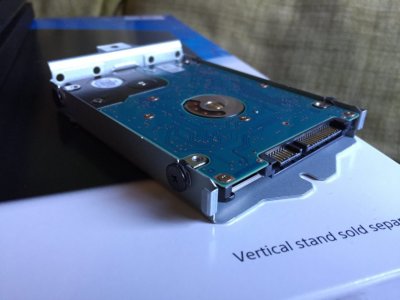
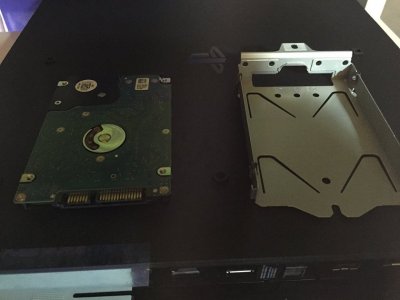
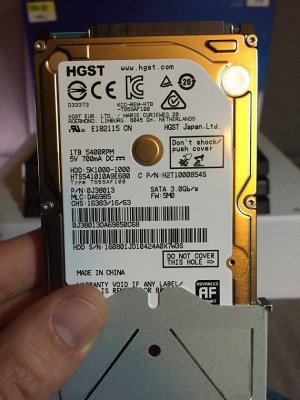
Finally, Press-Start.com.au shared the following guide on How To Upgrade The PS4 Pro Hard Drive to quote:
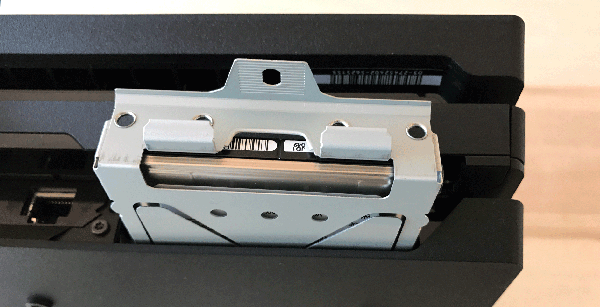
"Firstly, if you’re using a 2TB drive from your old PS4, ensure to back it up to an external HD first. Alternatively, make sure that your saves are in the cloud and you can redownload your games once your hard drive is in your PS4 Pro, but do be warned it will be wiped once it’s put into your PS4 Pro. You can check that your saves are in the cloud by going to Settings > Saved Data Management > Download to System Storage.
The PS4 Pro will take any 2.5 inch Serial ATA internal drive, keeping in mind that it needs to be 9.5mm or thinner. The largest capacity that you’ll widely be able to find in Australia is 2TB. You can...
For those not keeping track, some PS4 Pro Unboxing videos are now live and Sony recently updated their PlayStation 4 Professional FAQ... so we've followed suit on the PS4 Pro Ultimate FAQ here with the latest additions near the bottom.
PS4 Pro: How To Change the Hard Drive
PS4 Pro Hard Drive Removal (High Quality)
"Firstly, if you’re using a 2TB drive from your old PS4, ensure to back it up to an external HD first. Alternatively, make sure that your saves are in the cloud and you can redownload your games once your hard drive is in your PS4 Pro, but do be warned it will be wiped once it’s put into your PS4 Pro. You can check that your saves are in the cloud by going to Settings > Saved Data Management > Download to System Storage.
The PS4 Pro will take any 2.5 inch Serial ATA internal drive, keeping in mind that it needs to be 9.5mm or thinner. The largest capacity that you’ll widely be able to find in Australia is 2TB. You can...
Grabbing PSNS Product Codes and How to Guide
Well after news that SilicaAndPina claims to have a PS4 Browser Crash for the latest PlayStation 4 Firmware (AKA Don't Crash) from the Source Code it appears to use the PSNS: code which only loads PSN Store and is able to select products via command instead of going through PSN Store itself.
It looks like some people don't understand what PSNS does or how it works? So people say this only works for PS Vita, well for a fact it will work with PS3 and PS4.
This Game Meta is from my PS Account:
Spoiler: Game Meta
It looks like some people don't understand what PSNS does or how it works? So people say this only works for PS Vita, well for a fact it will work with PS3 and PS4.
This Game Meta is from my PS Account:
Spoiler: Game Meta
Decrypting and Dumping PlayStation 4 UserModules Guide by Zecoxao
PlayStation 4 developer zecoxao shared a guide today on how to decrypt and dump PS4 usermodules with help from skeu. 
To recap for those new, the first decrypted PlayStation 4 game was done by PS4 scene release group EPEEN, and scene group TRSi also sent out a call for decryption testers recently.
Read all about it below, to quote: Tutorial: How to decrypt and dump usermodules
First of all I'd like to say thank you to the person who has allowed me to post this tutorial. His English isn't perfect so he asked me to make this tutorial on his behalf. Thanks, grass skeu
So for this, you'll need:
1- Fire up elf loader on your 1.76 console
2- Let it load all the way up to stage 5 without memory errors!
3- Compile the payload source. You can specify in between:
and
which module(s) you want to decrypt. if you want, you can even decrypt all modules from 1.76 Dump released a while ago! This includes elf, self, prx, sprx, sexe, sdll and eboot.bin.
However, take into notice that you can only decrypt usermodules from disc or psn apps when you have loaded them and minimize them (by pressing ps button), and only from absolute path! (due to npdrm management)
I have left an example:
To recap for those new, the first decrypted PlayStation 4 game was done by PS4 scene release group EPEEN, and scene group TRSi also sent out a call for decryption testers recently.
Read all about it below, to quote: Tutorial: How to decrypt and dump usermodules
First of all I'd like to say thank you to the person who has allowed me to post this tutorial. His English isn't perfect so he asked me to make this tutorial on his behalf. Thanks, grass skeu
So for this, you'll need:
- ps4sdk precompiled
- elf-loader precompiled OR alternatively extreme-modding.de's elf loader (found here)
- the payload source (DumpFile.zip)
- 1.76 console
- fat32 usb pendrive
1- Fire up elf loader on your 1.76 console
2- Let it load all the way up to stage 5 without memory errors!
3- Compile the payload source. You can specify in between:
Code:
ps4KernelExecute((void*)path_self_mmap_check_function, NULL, &ret, NULL);
Code:
ps4KernelExecute((void*)unpath_self_mmap_check_function, NULL, &ret, NULL);However, take into notice that you can only decrypt usermodules from disc or psn apps when you have loaded them and minimize them (by pressing ps button), and only from absolute path! (due to npdrm management)
I have left an example:
Code:
...
Create PS4 ELFs from PlayStation 4 Process Dumps Guide by Zecoxao
Today PlayStation 4 developer zecoxao shared a handy guide on how to create PS4 ELFs from PlayStation 4 process dumps.
Here is it for those interested, to quote: How to Create ELFs from Process Dumps
You'll need:
Go to your playground of choice (in this case my playground is extreme-modding.de one)
Step 2:
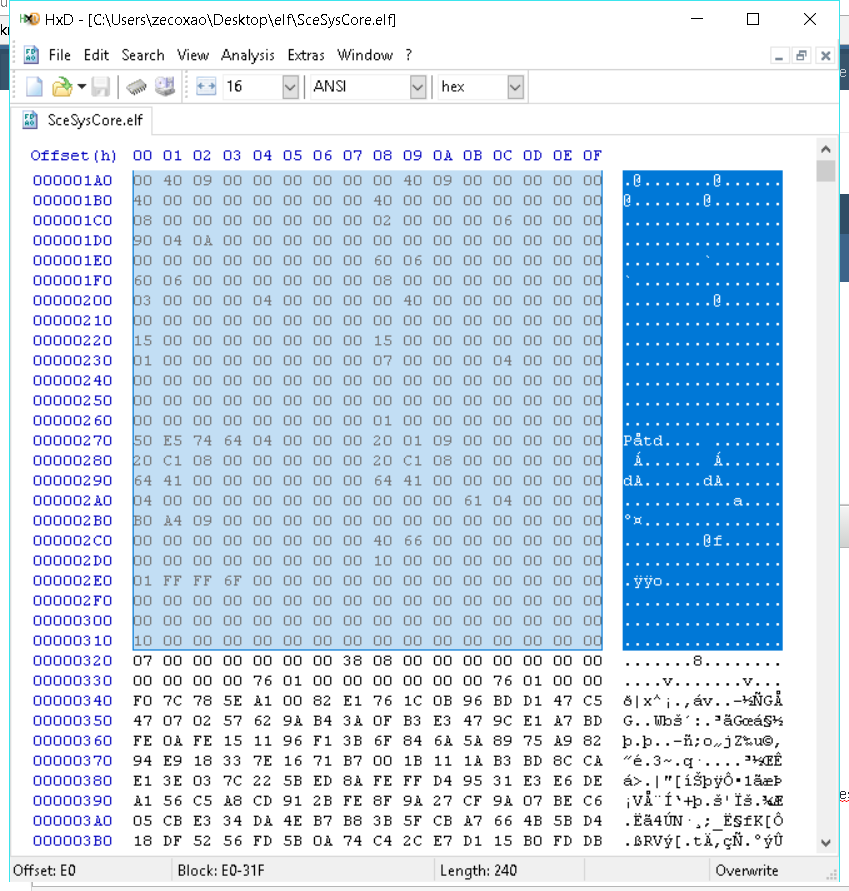
Grab your ELF or SELF that you want to make a forgery of (i'm going to use SysCore for this)
Step 3:
Look closely at the header and pick ONLY the elf header chunk of the file. Note here: the ELF header must contain all of it's necessary bytes EXCEPT the last 32!
Step 4:
Add the necessary number of bytes until the file has EXACTLY 0x4000 bytes.
Step 5:
If necessary restart PS4 so you can clean the payload's memory and then start PS4 file ninja.
Step 6:
Go to the process of choice (in this case SceSysCore) by going to Tools->Processes, picking SceSysCore and attaching to the process.
Step 7:
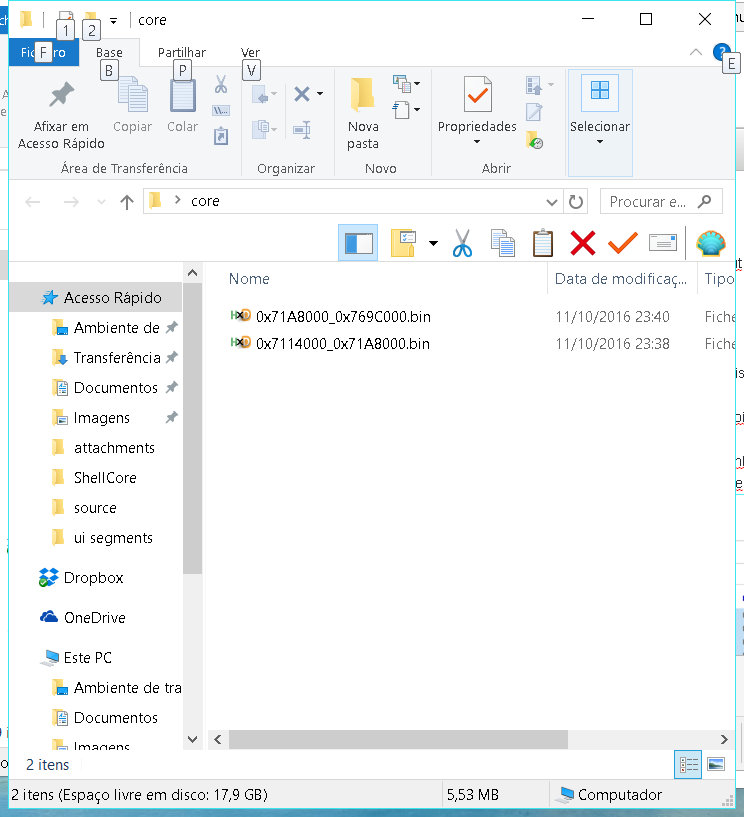
Dump the first process offsets, and ONLY those in the LOWER memory range. Here's my example:
Step 8:
Copy the first segment and add it after the end of the ELF forged header. Do the same for the other segments.
Step 9:
You have now a forged elf you can use in IDA for analysis.
Some Notes:
Here is it for those interested, to quote: How to Create ELFs from Process Dumps
You'll need:
- HX-D
- PS4 FileNinja v2.0 (the one with process dump support)
- Extreme-modding.de FTP payload (ps4_dev-dlclose_(FTP)_Kernel_Patch.bin (10 KB) / ps4_dev-dlclose_(FTP-Debug_Menu)_Kernel_Patch.bin (9 KB)) or you can use FileNinja but FileZilla is a better client for this purpose)
- a brain
Go to your playground of choice (in this case my playground is extreme-modding.de one)
Step 2:
Grab your ELF or SELF that you want to make a forgery of (i'm going to use SysCore for this)
Step 3:
Look closely at the header and pick ONLY the elf header chunk of the file. Note here: the ELF header must contain all of it's necessary bytes EXCEPT the last 32!
Step 4:
Add the necessary number of bytes until the file has EXACTLY 0x4000 bytes.
Step 5:
If necessary restart PS4 so you can clean the payload's memory and then start PS4 file ninja.
Step 6:
Go to the process of choice (in this case SceSysCore) by going to Tools->Processes, picking SceSysCore and attaching to the process.
Step 7:
Dump the first process offsets, and ONLY those in the LOWER memory range. Here's my example:
Step 8:
Copy the first segment and add it after the end of the ELF forged header. Do the same for the other segments.
Step 9:
You have now a forged elf you can use in IDA for analysis.
Some Notes:
- You can use readelf to check on how good your ELF looks.
- First...
Obtaining Your PlayStation 4 SFlash via PS4 Root FTP Server Guide
PlayStation 4 developer zecoxao recently shared a simple guide on how to obtain your SFlash from a root FTP server should something go terribly wrong with your PS4 console while trying to hack the hell outta it 
Here's the brief tutorial on how to grab your SFLASH from Root FTP Server, to quote:
The SFlash is useful for when something might happen to your PS4 (some changes that affect the console in a way that it won't be able to boot later) and in case you need it you can use it together with your hardware flasher device to undo the changes you made to flash that caused the console to brick.
What you'll need:
1- Enable the ftp server (big silver star) located at the PS4 Playground Menu
2- Connect with the client
3- Navigate to /dev/
4- There should be a device called sflash0. Download it.
5- Make sure its exact size after the download is finished is 33554432 bytes / 32768 KB / 32 MB
Congratulations! You should have your SFlash Keep it safe in a location only you know in case something goes wrong with your PS4.
Here's the brief tutorial on how to grab your SFLASH from Root FTP Server, to quote:
The SFlash is useful for when something might happen to your PS4 (some changes that affect the console in a way that it won't be able to boot later) and in case you need it you can use it together with your hardware flasher device to undo the changes you made to flash that caused the console to brick.
What you'll need:
- PS4 Playground
- FTP client such as FileZilla or Flash FXP
1- Enable the ftp server (big silver star) located at the PS4 Playground Menu
2- Connect with the client
3- Navigate to /dev/
4- There should be a device called sflash0. Download it.
5- Make sure its exact size after the download is finished is 33554432 bytes / 32768 KB / 32 MB
Congratulations! You should have your SFlash
Keep it safe in a location only you know in case something goes wrong with your PS4.- PS4 Fake PKG (FPKG) Sharing Guide
- 6.XX Webkit / 6.72 PS4 Jailbreak
- 7.00-7.02 Webkit Exploit
- 7.02 Webkit / 7.02 Kernel / PS4JB
- 7.50 Kernel Exploit / PS4JB 7.55
- 7.55 / 8.00 Payloads / PS4JB2 7.55
- 9.00 PS4 Webkit Exploit
- 9.00 PS4 Payloads / GoldHEN (Latest)
- 9.00 PS4 Jailbreak Kernel Exploit
- 11.00 PS4 Jailbreak Kernel Exploit
- 13.00 PS4 Kernel Exploit / 13.02 BD-J Bug
- 4.03 PS5 Webkit Exploit
- PS5 Kernel Exploit (ExFAT Bug)
- PS5 Root Keys Obtained
- 4.03 PS5 Kernel Build String
- 4.03 PS5 Webkit Execution
- 4.03 PS5 Kernel Vulnerability
- 4.03 PS5 Filesystem Dumps
- 4.51 PS5 BD-JB Sandbox Escape
- PS5 BD-JB Exploit Hack Source Code
- Mast1c0re PS5 Userland Exploit
- PS5 Kernel Access via PS4 Exploit
- PS5 exFAT Vulnerability Disclosed
- 4.03 PS5 Kernel Exploit Webkit ROP
- 4.50 PS5 Kernel Exploit Webkit ROP
- 4.51 PS5 Kernel Exploit Webkit ROP
- 4.xx PS5 Kernel Exploit v1.01
- 4.xx PS5 Kernel Exploit v1.02 / v1.03
- PS5 1.00-6.50 Firmware Webkit
- Native PS5 ROP Chain Execution
- Mast1c0re PS5 Compiler Attack
- PS5 FreeBSD Kernel Bug & WebKit
- PS5 UMTX 2 Exploit & PS5 Jailbreak
- Byepervisor PS5 Hypervisor Exploit
- Lua Lapse PS5 Kxploit & Laps3c0re / Y2JB
- 12.00 / 12.70 PS5 Kernel Exploit